
What if I told you that it’s not your content or advice that’s holding you back from winning with Zoom meetings, but it’s how you PRESENT yourself?
More specifically, it’s inattention to audio quality, Zoom video settings, and technology?
Well, sadly, when I’m consulting with insurance and financial advisors, I find this to be true more often than not.
But the good news is most of these shortcomings are DEAD-SIMPLE fixes.
My team and I have hosted thousands of meetings, webinars, and presentations over the past few years and we’ve learned a lot.
And while there are certainly some high-level factors that influence the success of virtual meetings, we’ve found that so much of the success happens in the tiny details on the back end.
You obviously need ingredients like registrations, good content, and trust…but it’s really difficult to achieve significant results if you don’t lay the foundation correctly.
So this week, I want to talk about Zoom features – those little settings at the bottom of your Zoom screen.
And if you can learn which buttons to click, which boxes to check and uncheck, and which pieces of inexpensive tech you need on your desk…you’ll set yourself apart from 98% of other insurance and financial advisors.
Why do I believe that?
Because I’ve seen it OVER & OVER again…
Zoom Audio Settings & Best Practices
While Zoom is primarily a video conferencing platform that allows you to engage with prospects, clients, and team members in a “face-to-face” manner, audio quality is still very important.
I can’t stress this enough.
If your voice is distorted, difficult to hear, crackled, muted, or blasting through the speakers, it’s going to compromise the quality of your meeting.
On the other hand…
If your voice is rich, even, and balanced, it sets the tone for the rest of the meeting.
To get a rich broadcast-quality sound, I recommend insurance and financial advisors invest in two specific pieces of equipment:
#1: Standing Desk
I know what you’re thinking…
What does a standing desk have to do with audio quality?
And to that, I say, everything.
It has everything to do with the projection and tone of your voice.
And when you combine that with the right equipment, it allows you to achieve that rich broadcast-quality sound that I’m talking about.
You see…standing up when you speak impacts how you sound by:
- Allowing more oxygen to flow through your lungs
- Making it easier to breathe properly
- Allowing for more natural body expressions when talking
- Helping convey power and feelings of dominance/security
- Boosting circulation and improving your mood
But don’t take my word for it. Try a little experiment where you record a video of you reading a script for 60 seconds while sitting down. Then record yourself reading the same script while standing. You should notice a distinct difference in how it sounds.
The standing desk marketplace has exploded over the past five years, so you’ll find plenty of options online.
I personally like the desks from Vari. They’re affordable, high quality, and come in a variety of models. (I have no affiliation with them, I’ve just heard plenty of good things.)
When shopping for a standing desk, you should know that there are two basic types:
The first option is a desk converter that literally sits on top of your existing desk and raises or lowers to allow you to sit or stand.
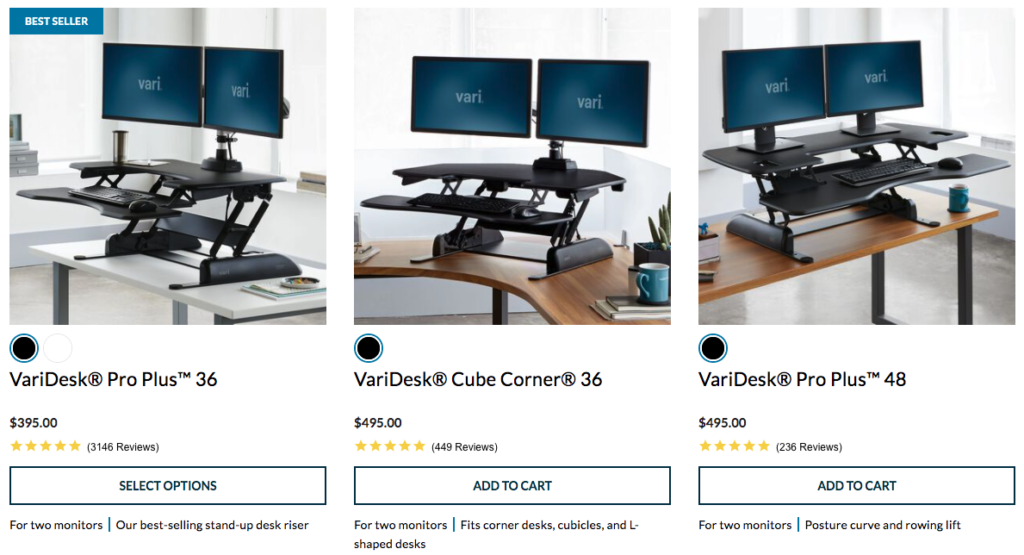
Then you have the complete electric standing desks which feature an electric lift that allows the entire desktop to raise and lower.
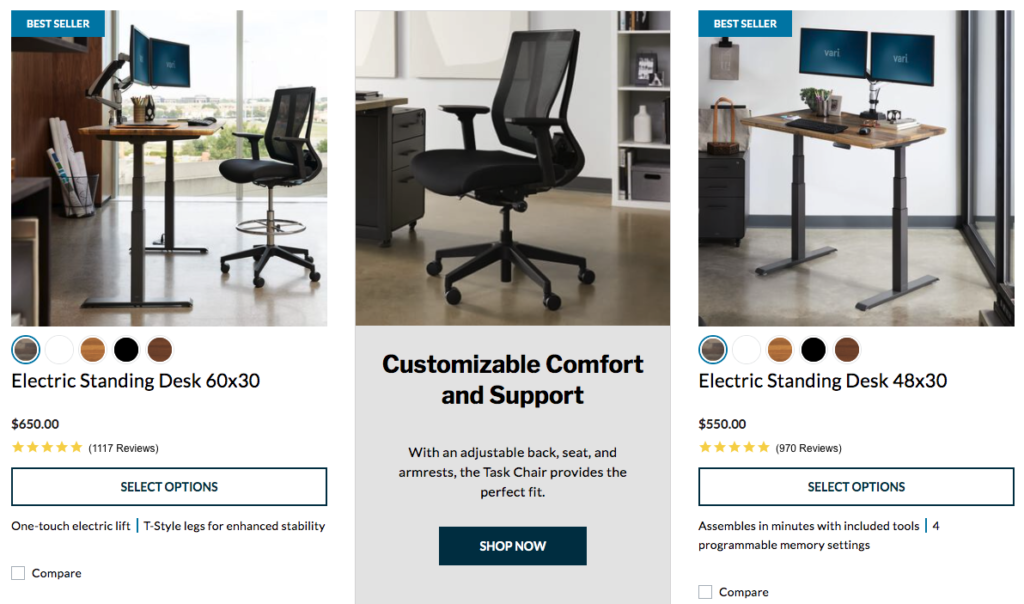
Unless you’re really partial to your current desk and don’t want to replace it, I believe this latter option is the best. It looks a lot less cluttered and allows for greater flexibility.
#2: High-Quality Microphone
Armed with a quality standing desk that allows you to stand in order to improve the strength, balance, and projection of your voice, you can now turn your attention towards investing in a high-quality microphone.
While your computer’s built-in microphone sounds okay, there’s a significant increase in quality when you switch to a USB microphone.
Best of all…they’re extremely inexpensive.
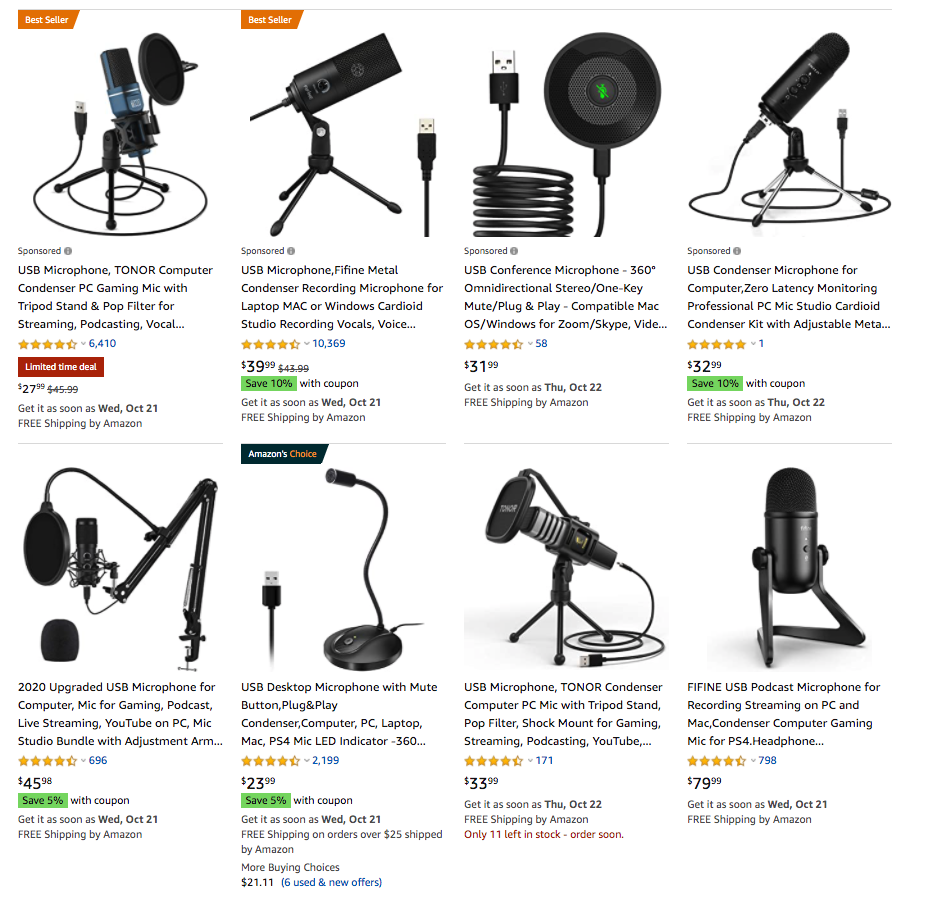
As you can see, the most expensive of these options is $79, with most coming in below $40.
That’s a solid investment for something that will set you apart from 99% of your fellow advisors who are just relying on their computer’s built-in microphone.
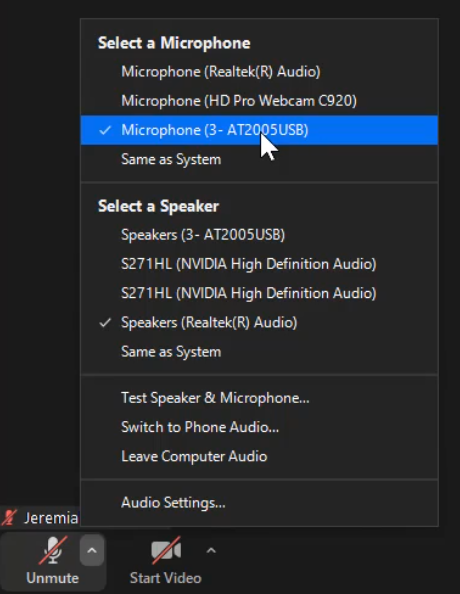
Once you purchase a microphone and set it up, Zoom will automatically detect it.
Simply select the microphone you want to use under the audio settings and give it a test.
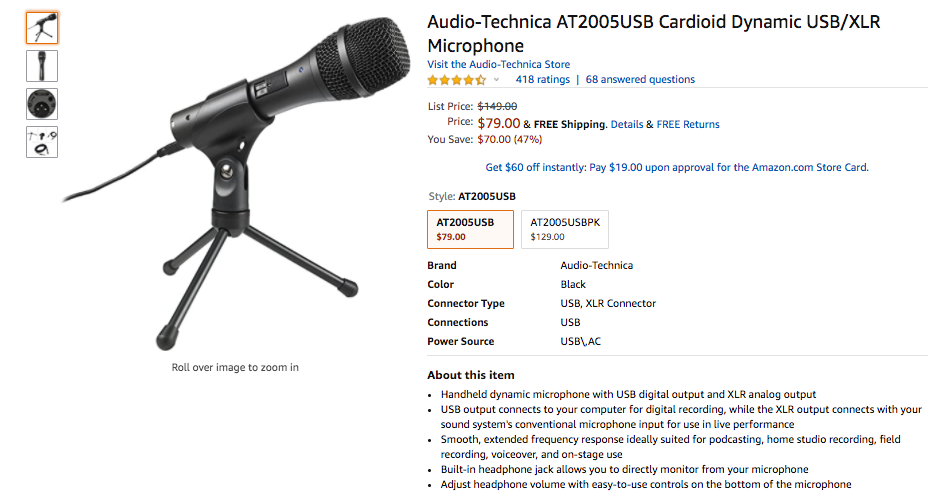
(For the record, I love my Audio-Technica AT2005USB. You can get it on Amazon $79.)
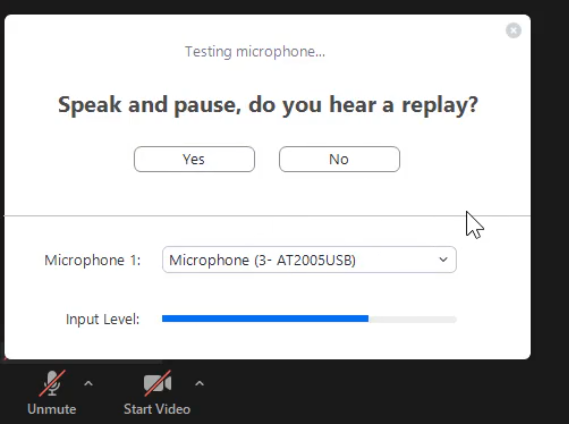
I recommend always logging into meetings about 10 minutes beforehand and checking the audio and sound.
You can use the test feature to make sure everything is good.
Here are my recommended audio settings.
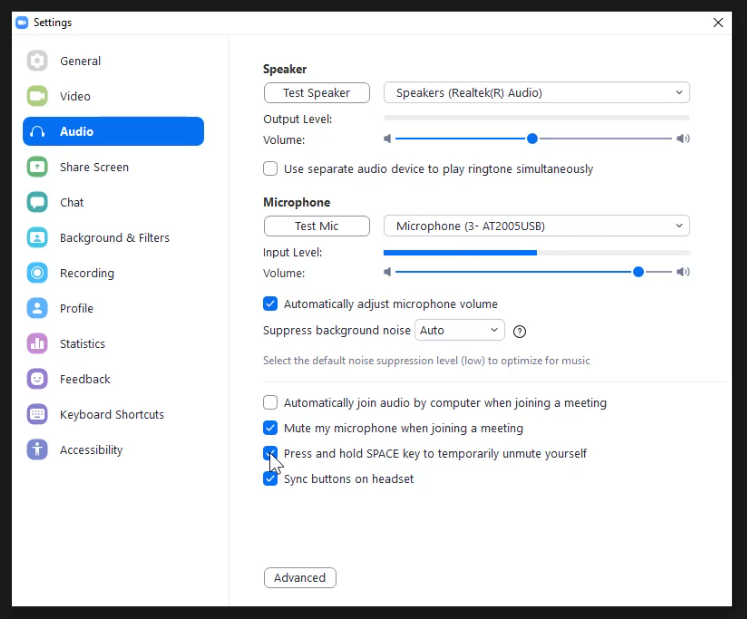
And that’s pretty much it for basic audio settings.
If you spend the extra time and money to optimize audio, you’ll instantly have a leg up.
Remember…just two things:
- Standing Desk
- USB Microphone
This is low hanging fruit, my friends. Pluck it!
Zoom Video Settings & Best Practices
Now it’s time to talk about Zoom video settings.
While slightly more involved than the Zoom audio settings, getting the best Zoom video quality isn’t nearly as difficult as you might think.
There are four specific elements that I believe are integral.
I’ll lay them out for you here – including some different gadgets and equipment you’ll want to purchase in order to further enhance your video quality.
#1 Lighting
Start by testing your Zoom video and study the lighting.
Is one side of your face brighter than the other?
Are there massive sun spots bleeding through nearby blinds?
Are you too dark and pixelated? Or perhaps your entire face is washed out?
These lighting issues can be fixed relatively easily by using a desk light (or pair of them).
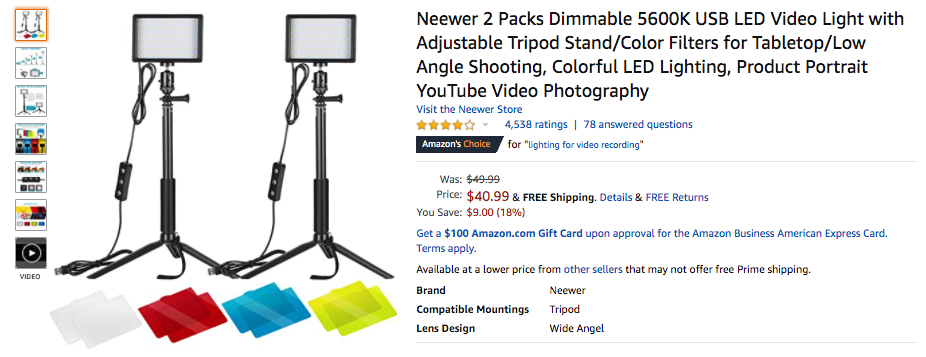
Not only is it just $40, but it does the job!
The set comes with two dimmable cameras (can be dimmed from 10% to 100%), adjustable tripods, and even some color filters if you want to play around with different effects.
Here’s an example of a Zoom video experiment I recently did.
The first image is of me without any sort of desk light – just natural light in my office.
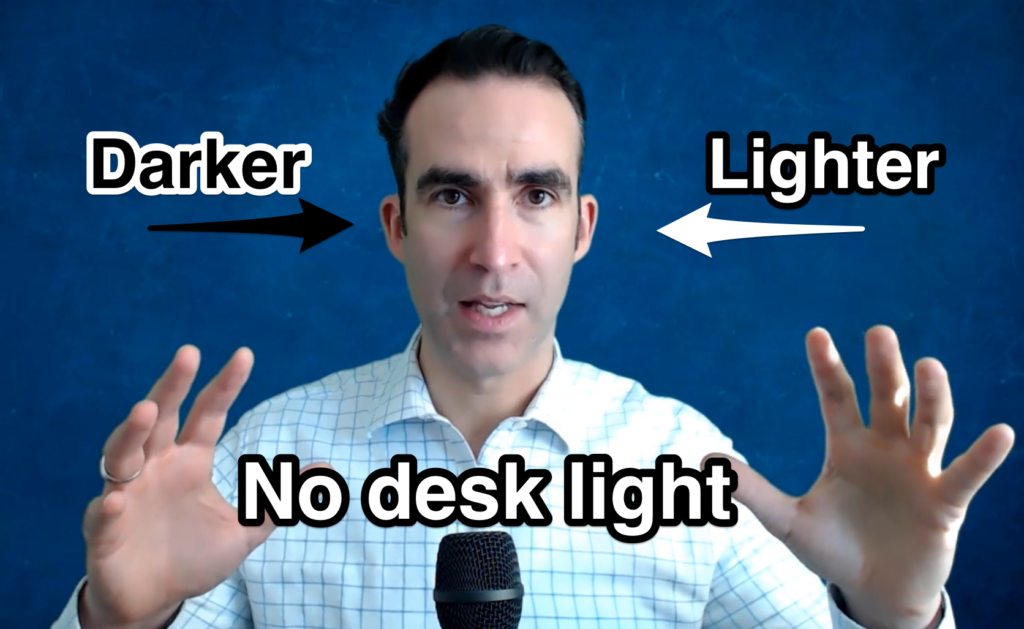
You can see how the light from my office window is hitting me on the left side of my body/face, while the right side of my face is only getting the artificial light from my office lights.
Now look what happens when I turn on Zoom light: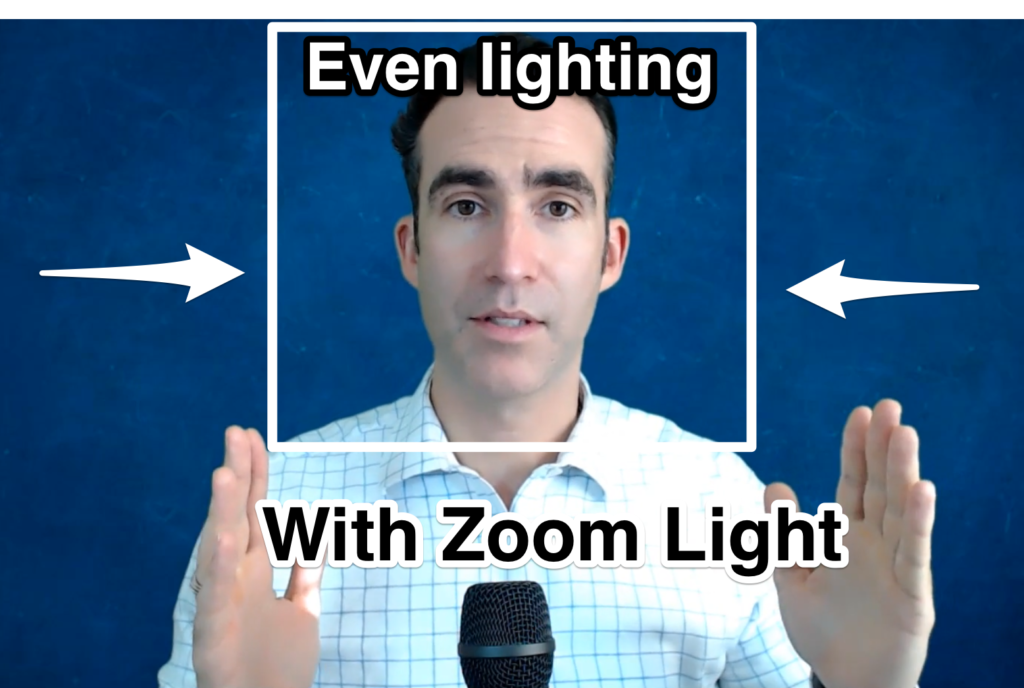
It’s a subtle difference, but it makes a difference. Notice how balanced the lighting on my face is.
(You can also lower the lighting if you want to create a darker image.)
#2 Camera
Next let’s talk about cameras.
While most of today’s newer laptops and desktop computers have solid webcams built in, you can get a much better Zoom video quality with higher resolution picture if you invest in an add-on camera.
I really like the Logitech HD Pro Webcam C920.
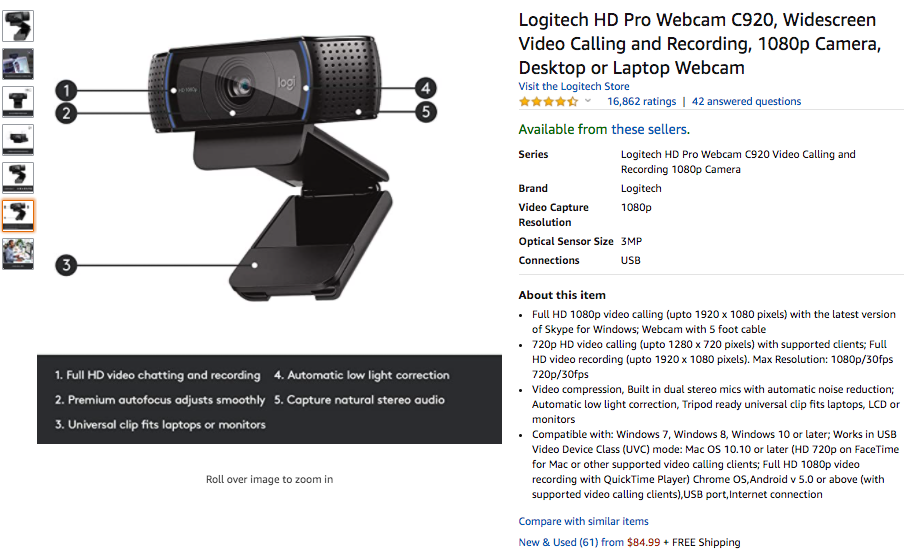
I’ve been using it for a while and it gives off a really crisp image. (And it simply clips onto my computer, which makes it easy to take on and off when needed.)
I’m not saying this is the only option…it’s just the one that I use – so I’m comfortable vouching for it.
#3 Virtual Backgrounds
Everyone loves playing around with virtual backgrounds.
But a client meeting is not the time to try out a Star Wars background with the ruins of the Death Star flanking your shoulders.
Save that for when you chat with your buddies from college.
Think about it like this: Your virtual background is more than just a background. It’s a representation of you.
You want to give off a professional image that builds trust.
Run a Google search to look for virtual backgrounds.
You can also create your own custom background using your logo in Canva.
Think strategically about the color psychology behind your background and choose wisely. Here are some of the different associations the brain creates with different colors:
- Blue = Confidence, trust, loyalty, calmness, security.
- Red = Exciting, urgent, demands attention, raises heart rate.
- Green = Growth, natural/organic, associated with money.
- Yellow = Happiness, optimism, causes the release of serotonin.
- Orange = Fun, ambitious, attention-getting.
- Grey = Solid, timeless, sleek, professional.
- Black = Elegance, power, strength, authority, professionalism.
- White = Cleanliness, clarity, organization, simplicity.
The fact that you went through the extra care to find a unique/sophisticated background shows that you care.
#4 Good Green Screen Backgrounds
Want to get an even better background?
Get a good green screen background and take your Zoom presence to a whole new level.
Trust me.
I’ve been using a green screen since back in the spring and it’s made a huge difference in the quality of my video.
Just take a look at this before and after: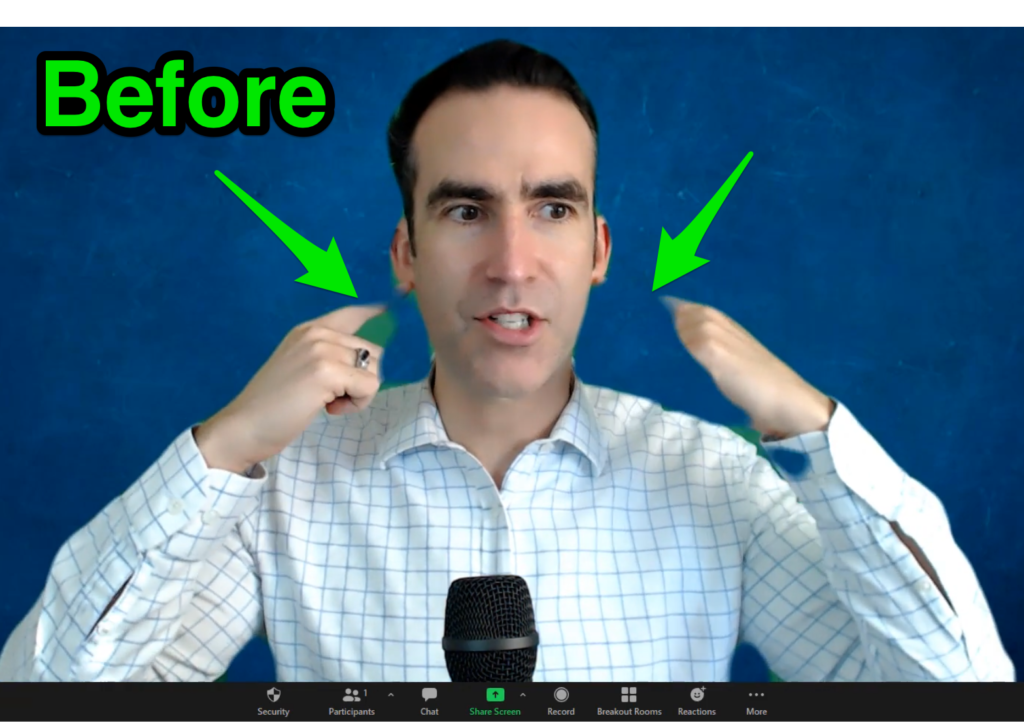
Do you see how there’s distortion when I’m just using a virtual background without the green screen option?
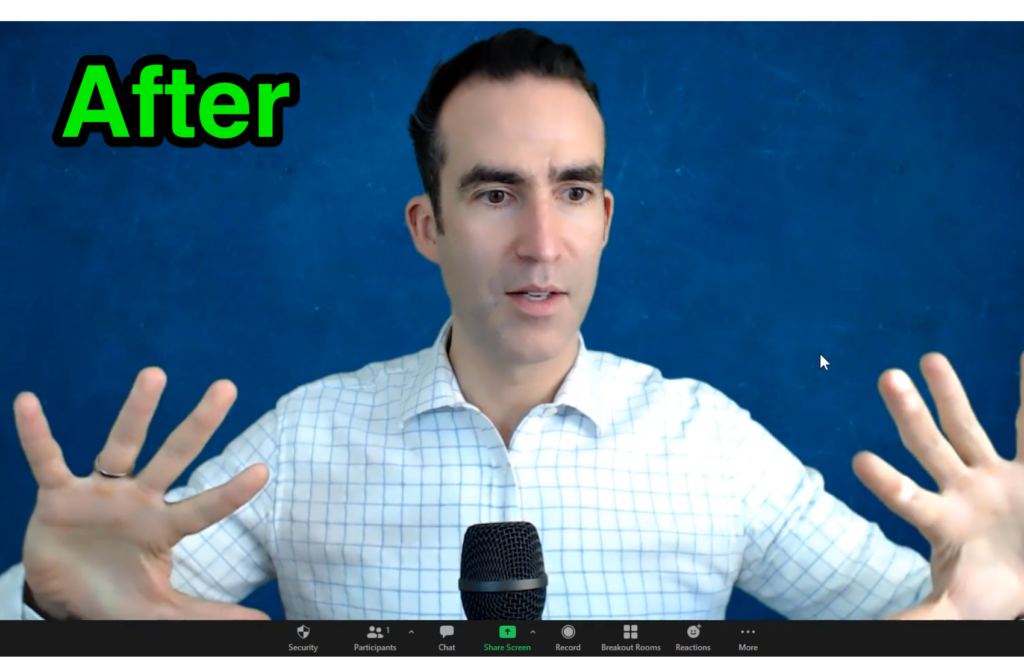
Then look at the difference after I check the “I have a green screen” box.
All of that distortion goes away and I’m able to move around without the splotches, distortion, or disappearing fingers.
That setting can be activated here:
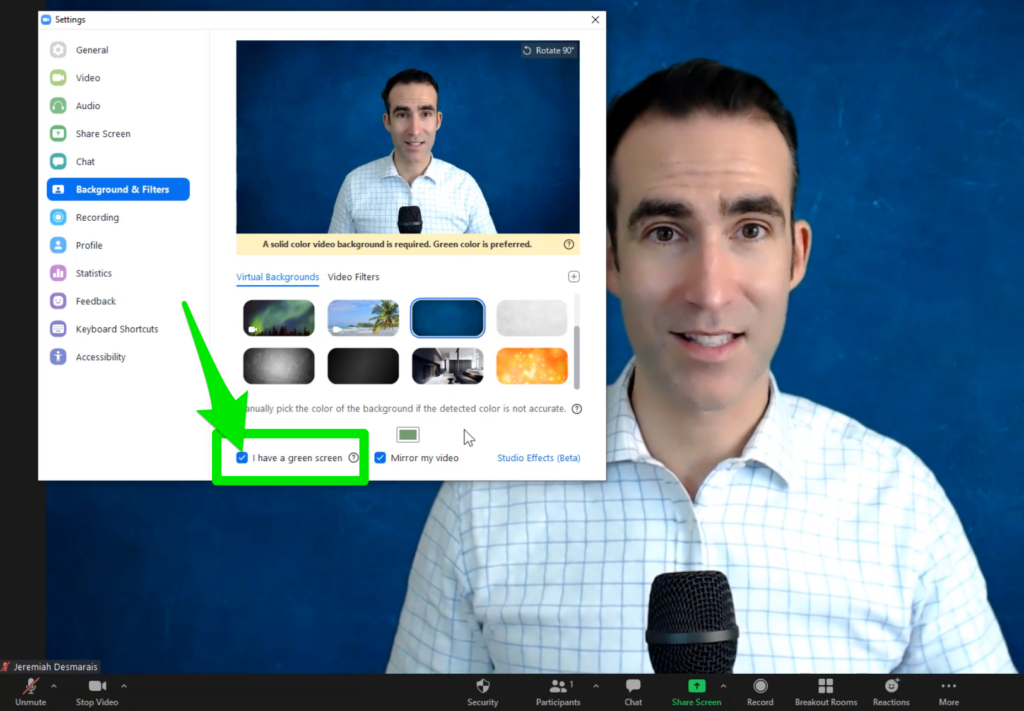
However, don’t click this setting unless you actually have a green screen. (If you try to trick Zoom, you’ll actually end up with a worse quality video.
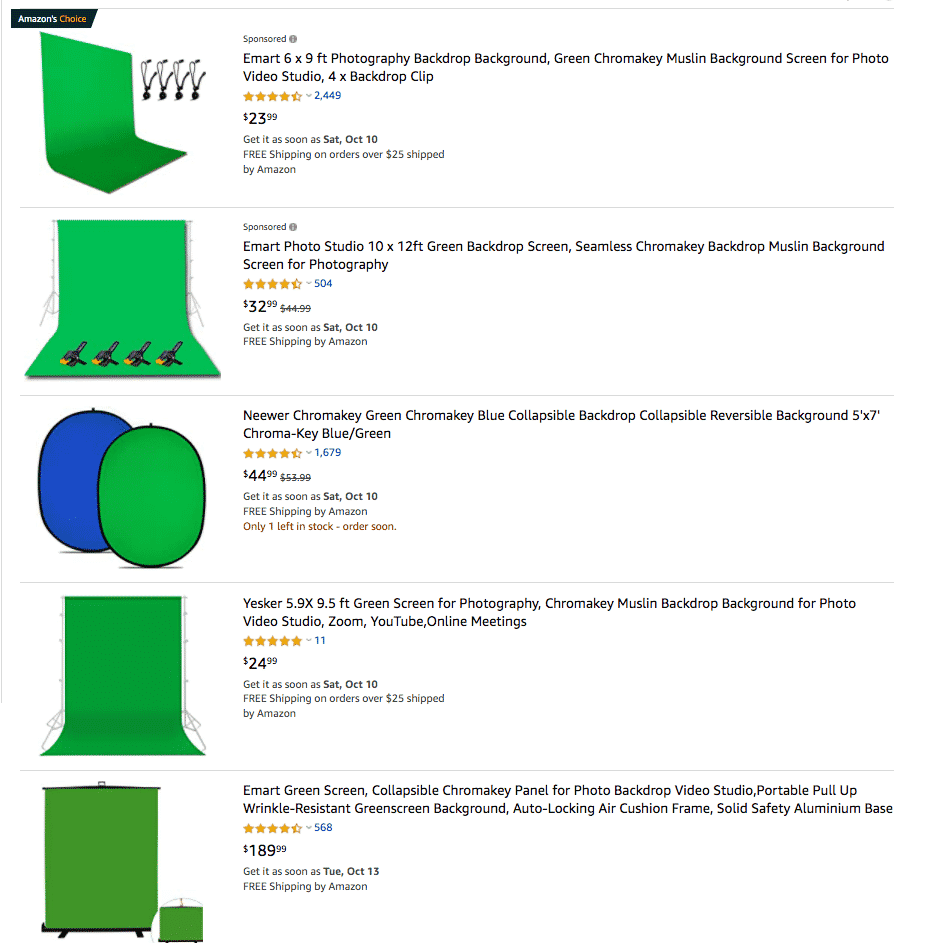
If you don’t already have a green screen, I’d recommend taking a few minutes to browse Amazon.
You can find numerous options, including collapsible and retractable green screens, full green screens with frames, green screen fabric sheets (which you can affix to your office wall), or even portable greens screens that attach to the back of your office chair.
Grab Your 7-Figure Zoom Playbook For Insurance & Financial Advisors
Want a complete walk-through with click-by-click screenshots of how to completely OPTIMIZE your Zoom settings to host more WINNING meetings?
My team has put together a massive PDF with 51+ screenshots telling you precisely how to achieve the same settings that I’ve used to host 7-Figure Zoom Meetings.
All of the tips and hacks from this article are included, plus dozens more…
All you have to do is tell us that you NEED the playbook!
[optin-monster-shortcode id=”zf5szvcmaovq70ghmdwo”]
Get a Ph.D. in Virtual Meetings
Want more killer Zoom meeting tips and best practices to GROW your practice, schedule more meetings, and ultimately generate more $$$ in commissions and AUM?
Over the next few weeks, I’ll be hosting more FREE 1-hour LIVE workshops where I walk insurance and financial advisors through the top frameworks and swipe files for success.
All you have to do is RESERVE YOUR PASS and I’ll save a spot for you every Wednesday afternoon at 12 noon ET.